 Back to the Be Inspired Blog

Composting Is The Key To A Beautiful Home Garden
Are you tired of throwing all your kitchen scraps into the garbage? Food waste is a huge issue, but there’s a simple answer to reducing its impact: composting. It’s slightly more complicated than throwing everything in a bucket – but only slightly. It will also benefit everything, from your houseplants to that raised bed of vegetables you might have growing in the backyard.
What Is Composting?
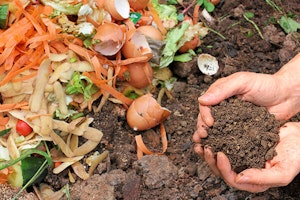
If you’ve only heard of composting in the abstract, let’s take a minute for a quick overview of the process. Composting is taking your kitchen scraps and waste and helping them to decompose into a fertile soil that does fantastic things for your garden. It’s basically harnessing the power of nature’s natural decomposition process on your own timeline and for your own benefit.
The Key to Composting: Location, Location, Location
If you don’t have much of a yard, but you still want to give your houseplants a boost, there are small, countertop-sized options that don’t take up much room and will still churn out a fertile product. However, if you’ve got the space, outside is definitely preferable. Choose a location with access to a water source, and in a spot that receives moderate sunlight. You don’t want to completely dry out the composting material, but the added warmth from the sun can help speed along the process.
Recommended Ingredients For Composting
A healthy compost pile needs both nitrogen-based and carbon-based items called, respectively, green and brown material.
Green Material
-
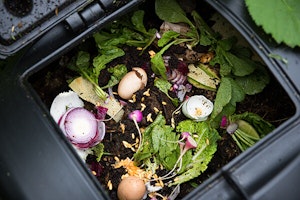
Vegetable and fruit scraps
-
Fresh grass clippings
-
Egg and nut shells
-
Coffee grounds
-
Tea bags
-
Bread products
-
Manure
-
Flat beer
Brown Material
-
Cardboard products
-
Dead leaves, branches, pinecones and needles
-
Paper egg cartons
-
Sawdust from untreated wood
-
Hay
-
Tissues and newspaper
-
Lint
-
Shredded junk mail
-
Wine corks
To get the process started and keep it going, you want to maintain a ratio of green to brown material at 1:2.
Avoid Composting These Items
Most composting systems don’t reach the necessary internal temperature to completely kill any bacteria that might live on the following items, so it’s best to leave them out entirely. In fact, adding synthetic components can actually destroy the microorganisms necessary for the composting progress. Avoid composting:
-
Bones and meat
-
Fats and cooking oils
-
Dairy products
-
Waste from dogs or cats
-
Treated wood
-
Weeds or diseased plants
-
Yard clippings with pesticides or herbicides on them
When Size Matters
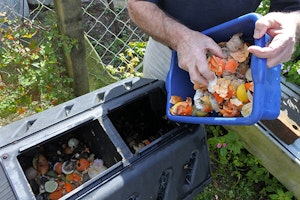
Like we mentioned earlier, if you live in a small apartment and only need a small amount of compost, consider vermicomposting (hello worms!), a counter top composter, or a small bin that fits on your balcony. For small-scale composting, like a simple backyard garden, a single bin or tumbler-style bin is perfect.
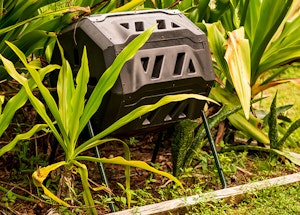
If you have a large amount of yard or garden to work with, we recommend a two- or three-bin system. The main benefit to this is that you will always have an actively composting bin, and another that is already cured and ready to use.
If you aren’t particular about appearances, you can also compost sans-bin. Simply find an unused corner of the yard and make a pile. Layer your green and brown contents, give it a good watering and till regularly. In the fall, cover your pile with a tarp to keep the wet out and let the compost continue developing over the winter.
The Step By Step Guide To Composting
Composting has four very straight-forward steps:
1. Layering
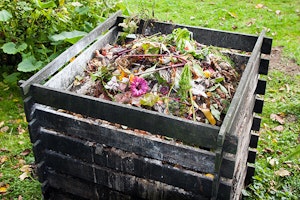
If you are building a stationary compost bin (as opposed to using one which can be turned on a hinge) do so on well-drained soil, and cover the bottom with a layer of gravel to aid with drainage. Once your bin is ready, lay down a six-inch layer of brown matter, and a two- to three-inch layer of green matter.
2. Watering
Water until moist, but not soggy, like the feel of a damp sponge. Repeat the layering process a second time and water again. Make sure you leave enough room in the bin the materials to be turned or stirred freely without spilling or crowding.
3. Turning (Tilling)
Use a pitchfork or shovel to toss everything together like a giant salad. If you’re using a barrel-style compost bin that is designed to turn -- simply turn the barrel. A pitchfork or shovel isn’t necessary. The more frequently you turn the composting materials, the faster the organic material will break down, as regular turning accelerates the composting process.
4. Repeating
The compost is ready when it resembles the color of healthy soil, feels loamy to the touch and smells pleasantly earthy. Depending on the contents, ratio of brown to green material and how often you turn, your compost will be ready anywhere between two months and a year.
Common Composting Problems And How To Fix Them
● Your compost is smelly.
You’re most likely not turning enough to allow for proper air circulation, or you may have watered too much. Add dry brown material and till.
● Your compost has stalled.
Your compost might be too dry. Add more green material, water and till.
● Compost is slimy.
There might be too much moisture in the mix. Add more brown material, back off on watering and till.
Tips For Composting Success
- Take the time to break larger pieces of brown and green material into smaller sizes to speed up the process.
- Be mindful of the 1:2 ratio of green to brown material.
- Activate a new compost bin with microorganisms by adding a shovel of soil from your garden, or purchase a compost activator. In addition, we recommend using E.B. Stone Organics Compost Maker to add vital nitrogen and additional nutrients to your compost.
Start Composting With Help From SummerWinds
If you’re looking for a few tools to get your composting project off on the right foot, stop in to any one of our three Bay Area locations and talk with our Trusted Garden Advisors. SummerWinds gardening experts can help determine which size of compost container is best for your needs, and give tips on how to get the most out of your scraps.


